🚧 This page needs work
Note: Needs updating for the new authentication model — add TRUSTGRAPH_TOKEN setup, replace user parameter with workspace, and update all code examples to use the token-based API
Building with React and TypeScript
Create a simple web application using TrustGraph with React and TypeScript
Intermediate
45 min
- A running TrustGraph deployment
- Node.js 16 or higher
- Basic React and TypeScript familiarity
Build a question-answering web application using TrustGraph with React and TypeScript.
In this guide, you’ll build a simple Q&A application that uses TrustGraph for LLM completions. The app demonstrates WebSocket connections, state management with Tanstack Query, and the @trustgraph/react-state hooks.
Step 1: Create Vite Project
Create an empty directory and initialize Vite with React + TypeScript:
mkdir trustgraph-qa-app
cd trustgraph-qa-app
npx --yes create-vite . --template react-ts
When prompted:
- Install rolldown-vite? Yes
- Install and run now? No
Install base packages:
npm install
Step 2: Install TrustGraph
Install the TrustGraph React state library, which includes the client, hooks, and Tanstack Query integration:
npm install @trustgraph/react-state
This installs:
@trustgraph/client- WebSocket client@trustgraph/react-provider- React context@trustgraph/react-state- Hooks and state management@tanstack/react-query- Query/cache management
Step 3: Configure Providers
Open src/main.tsx and add the provider imports after the existing imports:
import { QueryClient, QueryClientProvider } from '@tanstack/react-query'
import { SocketProvider, NotificationProvider } from '@trustgraph/react-state'

const queryClient = new QueryClient()

const notificationHandler = {
  success: (message: string) => console.log('Success:', message),
  error: (message: string) => console.error('Error:', message),
  warning: (message: string) => console.warn('Warning:', message),
  info: (message: string) => console.info('Info:', message)
}
Replace the createRoot expression at the bottom of the file:
createRoot(document.getElementById('root')!).render(
  <StrictMode>
    <QueryClientProvider client={queryClient}>
      <NotificationProvider handler={notificationHandler}>
        <SocketProvider user="trustgraph">
          <App />
        </SocketProvider>
      </NotificationProvider>
    </QueryClientProvider>
  </StrictMode>,
)
What this does:
QueryClientProvider- Enables Tanstack Query for caching and state managementNotificationProvider- Handles success/error/warning messages (we’re logging to console)SocketProvider- Establishes WebSocket connection to TrustGraph with user ID
Step 4: Configure WebSocket Proxy
Open vite.config.ts and add a server proxy configuration:
import { defineConfig } from 'vite'
import react from '@vitejs/plugin-react'

export default defineConfig({
  plugins: [react()],
  server: {
    proxy: {
      '/api/socket': {
        target: 'ws://localhost:8088',
        ws: true,
        rewrite: (path) => path.replace(/^\/api\/socket/, '/api/v1/socket'),
      },
    },
  },
})
What this does:
- Proxies
/api/socketto TrustGraph’s WebSocket endpoint atws://localhost:8088/api/v1/socket - Avoids CORS issues during development
- Keeps WebSocket URL relative to your app
Step 5: Build the App Component
Replace src/App.tsx with this Q&A interface:
import { useState } from 'react'
import { useInference } from '@trustgraph/react-state'
import './App.css'
function App() {
const [question, setQuestion] = useState('')
const [response, setResponse] = useState('')
// Get textCompletion function from useInference hook
const { textCompletion } = useInference()
const handleSubmit = async (e: React.FormEvent) => {
e.preventDefault()
if (!question.trim()) return
setResponse('')
try {
// Call TrustGraph LLM with system prompt and user input
const result = await textCompletion({
systemPrompt: 'You are a helpful assistant.',
input: question
})
setResponse(result)
setQuestion('')
} catch (error) {
setResponse('Error: ' + (error instanceof Error ? error.message : 'Unknown error'))
}
}
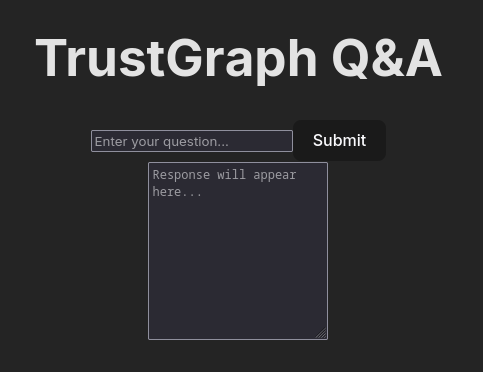
return (
<div className="app">
<h1>TrustGraph Q&A</h1>
<form onSubmit={handleSubmit}>
<input
type="text"
value={question}
onChange={(e) => setQuestion(e.target.value)}
placeholder="Enter your question..."
className="question-input"
/>
<button type="submit">Submit</button>
</form>
<textarea
value={response}
readOnly
placeholder="Response will appear here..."
className="response-output"
rows={10}
/>
</div>
)
}
export default App
Key concepts:
useInference()- Hook providing LLM operations (textCompletion, streaming, etc.)textCompletion()- Sends prompt to LLM and returns complete response- State management - Simple React state for input/output
Step 6: Run the Application
Start the development server:
npm run dev
Visit the URL shown in the terminal (typically http://localhost:5173).
Try it:
- Type a question like “What is cheese?”
- Click Submit
- The response appears in the text area after the LLM processes your question
Adding Streaming Responses
To display responses as they stream in, modify the handleSubmit function:
const handleSubmit = async (e: React.FormEvent) => {
  e.preventDefault()
  if (!question.trim()) return

  setResponse('')
  try {
    // Use textCompletionStream for streaming
    const stream = await textCompletion({
      systemPrompt: 'You are a helpful assistant.',
      input: question,
      streaming: true  // Enable streaming
    })

    // Append each chunk as it arrives
    for await (const chunk of stream) {
      setResponse(prev => prev + chunk)
    }

    setQuestion('')
  } catch (error) {
    setResponse('Error: ' + (error instanceof Error ? error.message : 'Unknown error'))
  }
}
This creates a typewriter effect as the response streams from the LLM.
Using Graph RAG
Replace the useInference hook with useGraphRag for knowledge graph queries:
import { useGraphRag } from '@trustgraph/react-state'

function App() {
  const [question, setQuestion] = useState('')
  const [response, setResponse] = useState('')

  const { graphRag } = useGraphRag()

  const handleSubmit = async (e: React.FormEvent) => {
    e.preventDefault()
    if (!question.trim()) return

    setResponse('')
    try {
      const result = await graphRag({
        query: question,
        collection: 'default',
        streaming: true
      })

      for await (const chunk of result) {
        setResponse(prev => prev + chunk)
      }

      setQuestion('')
    } catch (error) {
      setResponse('Error: ' + (error instanceof Error ? error.message : 'Unknown error'))
    }
  }

  // ... rest of component
}
Graph RAG queries retrieve relevant knowledge from your document collection to answer questions.
Available Hooks
The @trustgraph/react-state library provides hooks for all TrustGraph operations:
import {
  useInference,      // LLM text completions
  useGraphRag,       // Knowledge graph queries
  useDocumentRag,    // Document-based queries
  useAgent,          // Agent-based reasoning
  useLibrary,        // Document management
  useKnowledge,      // Graph operations
} from '@trustgraph/react-state'
Each hook returns functions that handle WebSocket communication, state management, and error handling automatically.
Production Deployment
For production, build the app and serve it with a web server:
npm run build
This creates optimized files in dist/.
Deployment considerations:
- Web server - Use nginx, Apache, or a cloud platform
- WebSocket proxy - Configure your server to proxy
/api/socketto TrustGraph - Authentication - Add auth middleware at the nginx/server level
- Domain - Ensure WebSocket and app are in the same domain to avoid CORS issues
Example nginx configuration:
server {
  listen 80;
  server_name example.com;

  # Serve React app
  location / {
    root /var/www/app/dist;
    try_files $uri $uri/ /index.html;
  }

  # Proxy WebSocket to TrustGraph
  location /api/socket {
    proxy_pass http://trustgraph:8088/api/v1/socket;
    proxy_http_version 1.1;
    proxy_set_header Upgrade $http_upgrade;
    proxy_set_header Connection "upgrade";
    proxy_set_header Host $host;
  }
}
Next Steps
- Explore other hooks:
useAgent,useDocumentRag,useLibrary - Add file upload for document processing
- Implement chat history with conversation state
- Style the interface with your design system
- Add authentication and user management